If bare metal restore is akin to changing a flat tire in your IT infrastructure then recovery media is the jack that lets you get started. For users of Carbonite Server Advanced or the Carbonite Backup Appliance, it’s very important to create a recovery media when you install and set up Carbonite’s image backup and bare metal restore functions. If you don't have the recovery media, you will not be able to do a restore.
Pro Tip: Carbonite offers a free valet install. When taking advantage of this great feature, be sure to ask your technician to help you build out your recovery media or ask your IT partner to set it up during installation.
Here’s how to build your recovery media for Carbonite's image backup and bare metal restore.
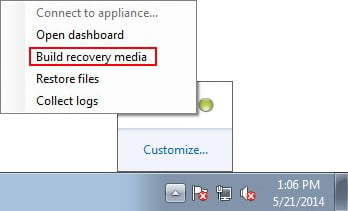
1. Whether you’re using the Carbonite Backup Appliance or Carbonite Server Advanced, head to the notification area and select Build recovery media.
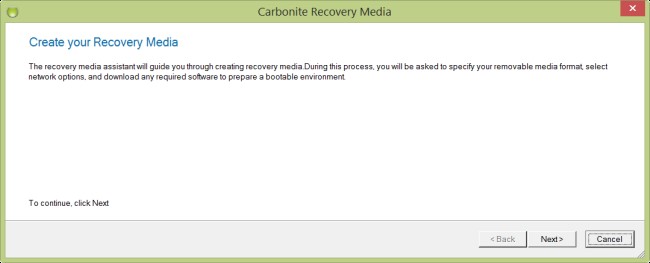
2. Next you will see the Recovery Media Builder Wizard open on your computer. Click Next to continue.
3. Your next step is to select the type of recovery media you wish to build. Your choices are Removable flash media, which will look for a USB connected device to use as the boot media, or ISO Image, which will create an ISO to boot from.
Within the Carbonite Backup Appliance contents we provide a USB Flash Drive for use with creating recovery media. If using Carbonite Server Advanced, we recommend that you use a USB Flash Drive in order to make the Recovery Media. Once you make your selection click Next.
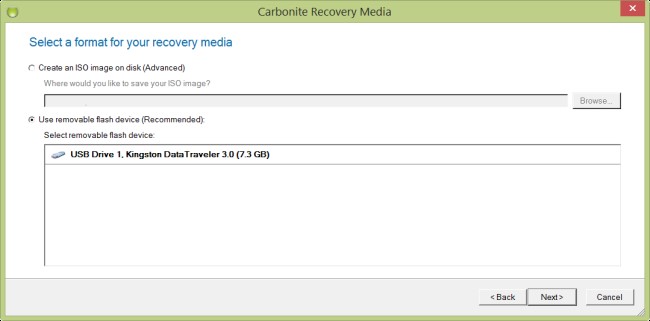
Note: If you select to use a Removable Flash Device as your recovery media, you may get a warning that any data on the selected USB flash drive will be completely erased. Also if you choose to create an ISO file, please save it in a location accessible on the network for future use.
4. Adding drivers into the recovery media is the next step. Drivers are useful if you have specific hardware installed that needs drivers before it will work. If you require specific drivers to be installed, click Add storage device drivers or Add network device drivers and you will be able to browse to where the drivers are so they can be included in the recovery media. Once you have added all the drivers you need, if necessary, click Next.

For more detailed instructions on adding drivers to your recovery media, please visit our knowledge base.
5. After you have added any drivers to your recovery media, you are prompted to decide your network connection. By default this is automatically set up after you have successfully performed a bare metal restore and restarted the machine. However, if your device requires specific network settings, you can make those selections or manually configure the settings after you first start up the device. We recommend, unless a specific IP address is required, that you connect automatically and obtain an IP address from a DHCP server.
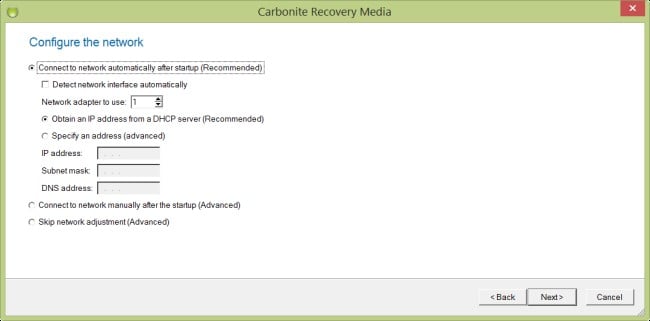
Once you have completed your selections, click Next.
6. You are next prompted to mount a network share. By default, the recovery media prompts you to not mount a network share. If you need to mount a share automatically after you boot the drive, you can select the appropriate option, browse to the shared location and provide the appropriate credentials.
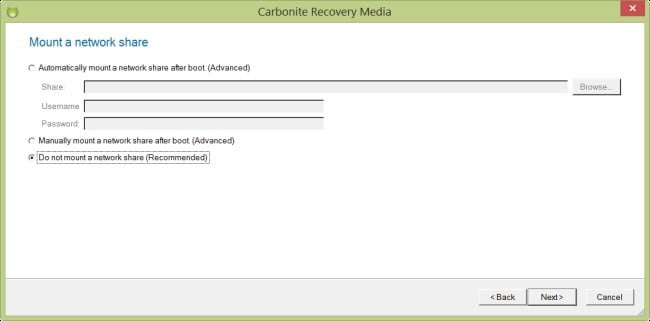
Click Next to continue.
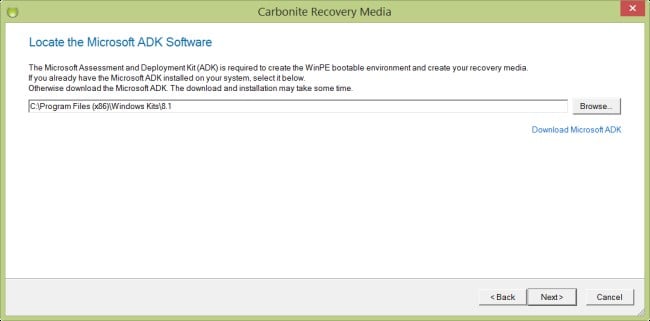
7. You are then also prompted to list the location of the Windows Assessment and Deployment Kit (ADK). The Windows ADK is what is used to facilitate the bare metal recovery process and needs to be installed on the computer you are building the recovery media on before you can continue. If you already have the software installed and listed in the field provided, please click Next to proceed to building the recovery media. Otherwise, please click Download ADK to be taken to the Microsoft Website.
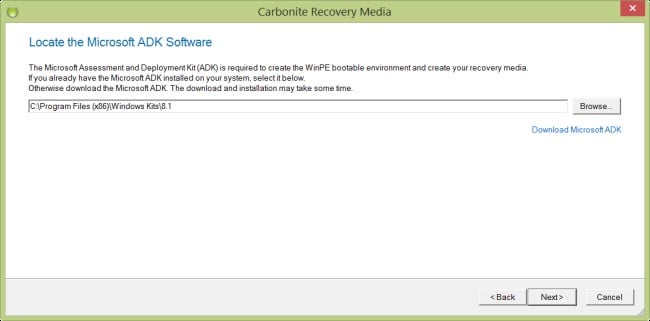
If you are having difficulty downloading the Windows ADK, please click this link to download it.
8. Within the Microsoft page, click Download to download and then run the ADK installer. The Assessment and Deployment Kit will run and you will be prompted to select a location to install the ADK. Wherever you install the ADK, please ensure that the device you are creating the recovery media on has access to that location. Click Next once you have selected this location.
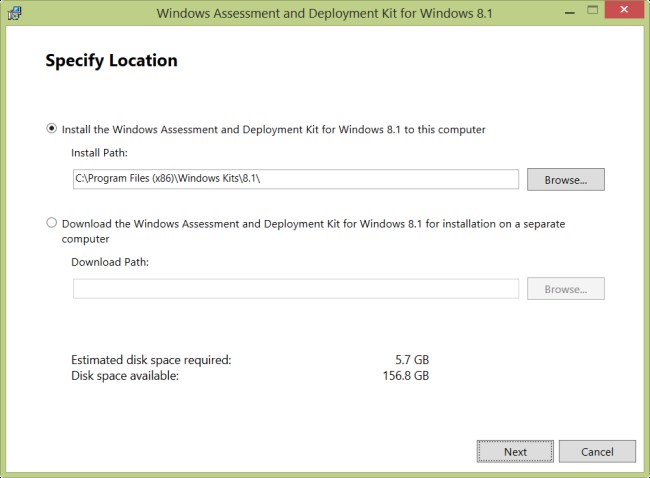
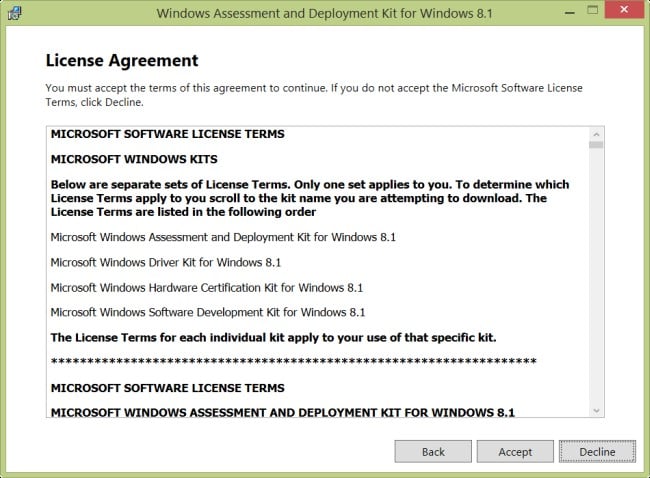
9. The ADK installer will next ask if you wish to join a Customer Experience support group. Please make your selection for yes or no and click Next. On this screen you will need to review the Microsoft License Agreement and click Accept to continue.
10. There will then be a list of features for you to install. Please ensure that Deployment Tools and Windows Preinstallation Environment (Windows PE) are selected. Click Install to continue.
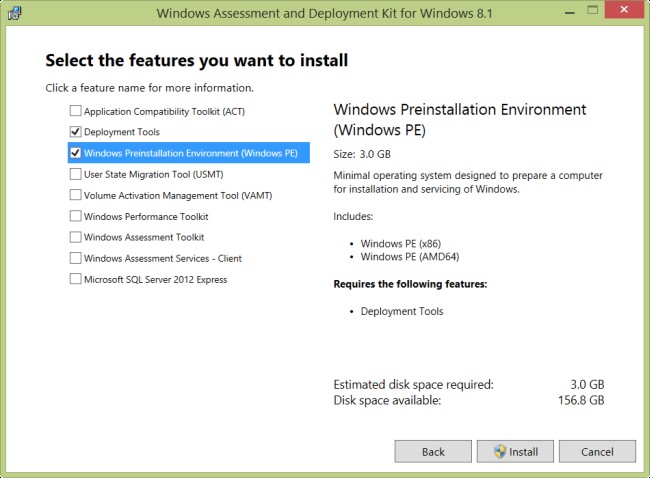
11. Once you click Install, the Assessment and Deployment Kit will install on your device. After the install has completed, please click Close and return to the Recovery Media builder.
12. Now that you have the Assessment and Deployment Kit installed, please make sure that the path is pointing to the correct location. If not, please click Browse and navigate to where you installed the ADK. Otherwise, click Next.
13. The recovery media will be begin being built with the specifications requested when running the Wizard. Once completed, you will be prompted with a screen indicating that the recovery media has been built.
You will now be able to boot your device from the media in case of a crash or data loss event. Please ensure that the media is not stored on the computer itself as you would not be able to access it if the computer crashes and you need to perform a bare metal restore.
Want to learn more? Read our last Ask a Carbonista: How do I restore data to dissimilar hardware?
Got a question you’d like to Ask a Carbonista? Send it to AskaCarbonista@Carbonite.com.

